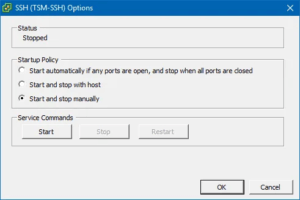
Start/Stop/Policy change for SSH in vCenter – All hosts connected

Connect-VIServer x.x.x.x

$All_Hosts = Get-VMHost
$SSH_Service = get-VMHostService -VMHost $All_Hosts | where {$_.Label -eq “SSH”}

#Start/Stop $SSH_Service

Stop-VMHostService -HostService $SSH_Service

Start-VMHostService -HostService $SSH_Service

#Change Startup Policy

Write-Host -ForegroundColor GREEN “Setting Startup Policy off ” -NoNewline
Write-Host -ForegroundColor YELLOW “$VMhost”
Get-VMHost | Get-VMHostService | where { $_.key -eq “TSM-SSH” } | Set-VMHostService -Policy “off” -Confirm:$false -ea 1

Unable to renew ESXi certificate just after making vCenter as subordinate CA

This issue happens because vCenter VMware Certificate Authority predates VMware vSphere ESXi certificates by 24 hours to avoid time synchronization issues. You can wait for 24 hours after replacing the VMware Certificate Authority certificate with an enterprise subordinate certificate for ESXi OR attempting to add additional hosts to vCenter Server. If there is need to renew certificate for ESXi immediately then change the vpxd.certmgmt.certs.minutesBefore to 10 (default 1440 minutes means 24 hours) from vCenter advanced settings.

Select Administration > vCenter Server Settings to display the vCenter Server Settings dialog box.

In the settings list, select Advanced Settings, search for vpxd.certmgmt.certs.minutesBefore

Modify the value to 10

Extending or increasing a datastore through vCenter Server fails

Source : VMware KB

Symptoms

After extending or increasing a datastore from the VMware vCenter Server using the vSphere Client, you experience these symptoms:

  • The extend or increase datastore task fails.
  • The vCenter Server fails to display the available unused disk space capacity.
  • After extending the LUN from the SAN, the new storage appears under Storage Adapters when viewed from the vCenter Server. However, the increased disk space is not showing or not available through the datastore properties.
  • The expanded or increased datastore capacity is empty.

Purpose

This article provides steps to resolve an issue where the added disk space is not visible, or the datastore capacity is empty after extending or expanding a datastore through the vCenter Server using the vSphere Client.

Cause

The VMware vCenter Server calls a specific function to get all the available extents for that datastore. After getting these extents, the vCenter Server displays these extents as available after meeting these following criteria filters:

  • LUNS are used as datastores on that ESXI host or on any other ESXi host (with exceptions to force mounted volumes).
  • LUNS are not used as Raw Device Mapping (RDMs) on that ESXi host or any other ESXi host.
  • LUNs are seen the same by all hosts.

Notes:

  • The vCenter Server applies these filters to stop any possible data corruption on already used LUNs by other host.
  • You can validate these from the vpxd logs with these steps:
    • Review LUN IDs for the LUNs in question on all hosts to make sure they are consistent.
    • Enable verbose logging for the vpxd logs and attempt to expand/increase the datastore. For more information, see the Set Verbose Logging section of the vSphere Monitoring and Performance Guide.
    • In the vpxd.log file, you see entries similar to: 

      [QueryAvailableDisksForVmfs] Removed all candidates because all LUNs in the datastore are not visible by the same hosts or have the same transport types

      Important: VMware recommends not to turn off the filters. Disabling these filters may result in storage device corruption or performance degradation. For more information, see the Storage Filtering section of the vSphere Storage Guide.

Resolution

NOTE: Before starting, verify LUN presentation is the same on all hosts as this is a common, legitimate cause and should not be worked around.

To resolve this issue, follow either one of the two options:

Increase or expand the datastore directly from the ESXi host

  1. From the Web Client, right click the ESXi host and select Storage > Rescan Storage. This forces the ESXi host to sync with the changes on the underlying expanded devices.

    vmware not seeing increase disk space
     
  2. Once the rescan storage completes, navigate to the Datastore View and select the increased or expanded datastore.
  3. Navigate to Configure > Device Backing and select Extent Name. You should see the Device Details reflecting the updated capacity from the expansion that was done from the SAN.

    Note: In this example, the datastore iscsi1 was configured for 25GB and the underlying device was expanded to 400GB.

    vmware increase datastore capacity empty

If the underlying device does not reflect the underlying information, attempt another host level rescan so that the fields highlighted in the image above indicate the desired change. Only follow these steps if the increase in the capacity of the underlying device is detected:

  1. Log in directly to one of the ESXi host that has access to the datastore through the GUI (Host Client) using root credentials.
  2. Navigate to Storage > Datastores and select the datastore you are trying to expand or increase.
  3. Right-click on the datastore and select Increase Capacity. Alternatively, select the Increase capacity button.

    increase datastore capacity empty
    You should be prompted to select one of two options:

    Add an extent to existing VMFS datastore
    Expand an existing VMFS datastore extent

    Note: The first option is to create a multi-extent datastores by spanning (adding) a new volume to the existing datastore. The second option is to increase the capacity for the existing device itself. In this example, the second option is used:
     
  4. Select the VMFS partition as highlighted in the image and use the side-scroller to indicate the range of the expansion that would need to be done and click Next.

    cannot expand datastore
     
  5. Click Finish. You should now be able to view the datastore expansion as completed.
  6. Immediately rescan all hosts by “rescan adapter” and “rescan vmfs” from vCenter.
    Or by commands on all hosts:
    $ esxcli storage core adapter rescan –all 
    $ vmkfstools -V

Important
As this was done directly on the ESXi host, VMware recommends to do a cluster level storage rescan so that all of the ESXi host accessing the same datastore are sync with the expansion that was recently completed. If a cluster level rescan is not done from the vCenter Server, there is a good chance that the vCenter Server might not readily detect the changes which may lead to disparity in the current space/usage of the datastore. VMware recommends to always do a cluster level rescan on the vCenter Server level when the datastore is increased or expanded directly from the ESXi host.

Temporarily disable the Same Host and Transport Filter

Important: VMware does not recommend to turn off or disable this filter. After temporarily turning off or disabling this filter, increase or expand the datastore. Once this is completed, ensure this filter is turned back on or re-enabled. Disabling these filters may result in storage device corruption or performance degradation that might be caused by an unsupported use of storage devices. For more information, see or more information, see the Storage Filtering section in the vSphere Storage Guide.

  1. Look for parameter config.vpxd.filter.sameHostsAndTransportsFilter under Advanced vCenter Server Settings and set it to false.
  2. Do not add the parameter if it already exists, as adding a duplicate parameter can cause vCenter instability. Instead, edit the existing parameter.

    Note: No reboot is required for changes to take into effect. Logging out and logging back in to the vCenter Server should be enough for changes to take into effect.

    cannot extend datastore
  3. Once completed, change config.vpxd.filter.sameHostsAndTransportsFilter under Advanced vCenter Server Settings and set it to true. For more information, see the Storage Filtering section of the vSphere Storage Guide.

Enable SSH Service on ESXi hosts using PowerShell

I found myself wanting to enable the SSH service on my ESXi hosts. I could use Host Profiles to enable it but I decided to PowerShell script it! To enable SSH there are three parts to it:

You will need to start the SSH service and set it to Start and Stop with Host:

And you will need to suppress the SSH is enabled warning message:

esxi-hosts-ssh-warning

This script does all of the above to an entire cluster. Let’s see it in action!

# Start SSH Service, change Startup Policy, and Suppress SSH Warning #

######################################################################

#Variables

$vCenter = “LABVC01.virtuallyboring.com”

$Cluster = “Nested ESXi Cluster”

### Start of Script

# Load VMware Cmdlet and connect to vCenter

Add-PSSnapin vmware.vimautomation.core

connect-viserver -server $vCenter

$VMHost = Get-Cluster -Name $Cluster | Get-VMhost

# Start SSH Server on a Cluster

ForEach ($VMhost in $Cluster){

Write-Host -ForegroundColor GREEN “Starting SSH Service on ” -NoNewline

Write-Host -ForegroundColor YELLOW “$VMhost”

Get-VMHost | Get-VMHostService | ? {($_.Key -eq “TSM-ssh”) -and ($_.Running -eq $False)} | Start-VMHostService

}

# Change Startup Policy

ForEach ($VMhost in $Cluster){

Write-Host -ForegroundColor GREEN “Setting Startup Policy on ” -NoNewline

Write-Host -ForegroundColor YELLOW “$VMhost”

Get-VMHost | Get-VMHostService | where { $_.key -eq “TSM-SSH” } | Set-VMHostService -Policy “On” -Confirm:$false -ea 1

}

# Surpress SSH Warning

ForEach ($VMhost in $Cluster){

Write-Host -ForegroundColor GREEN “Setting UserVar to supress Shell warning on ” -NoNewline

Write-Host -ForegroundColor YELLOW “$VMhost”

Get-VMhost | Get-AdvancedSetting | Where {$_.Name -eq “UserVars.SuppressShellWarning”} | Set-AdvancedSetting -Value “1” -Confirm:$false

}

### End of Script

ISE as we need to update a few variables:

  1. $vCenter: Enter your vCenter name of your vCenter name
  2. $Cluster: Enter the name of your Cluster

You are now ready to run the script!

PowerCli: bulk change ESXi root passwords with vCenter

Sometimes you have to change the root password for all ESXi hosts.


You can use the PowerCLI Set-VMHostAccount cmdlet. But this requires you to connect to each individual ESXi host, it cannot be run when connected to the vCenter server.

So, I’ve created a (rather small) script which changes the root passwords for all (or a subset) of the ESXi hosts, which are connected to a vCenter server.

$cred = Get-Credential -UserName "root" -message "Enter new ESXi root password"
$vmhosts = get-vmhost | Out-GridView -PassThru -Title "Select ESXi hosts for changing the root password"
Foreach ($vmhost in $vmhosts) {
    $esxcli = get-esxcli -vmhost $vmhost -v2 
    $esxcli.system.account.set.Invoke(@{id=$cred.UserName;password=$cred.GetNetworkCredential().Password;passwordconfirmation=$cred.GetNetworkCredential().Password})
}

This script request you to enter the new root password.
Then it request you to make a selection of ESXi hosts which from which the root password must be changed.
After you’ve pressed OK, a few moments (seconds) later, the root passwords have been changed for the selected ESXi hosts.

Please be aware that this script does not connect to the vCenter itself, it requires you to execute the connect-viserver cmdlet yourself.

Please leave a comment if you think this script is useful!

Fixing CD/DVD ROM Access Denied – Grant Permission | Windows Tutorial

It’s not that much hard to edit the registry. You just required to be careful enough to edit your registry settings and grant the permission.

Just follow the instructions to permit the fix CD/DVD access denied issue in Windows:

1. Go to Start >> Run >> type ‘regedit‘ and hit enter.

2. Navigate to Hkey_local_machine\SYSTEM\CurrentControlSet\Control\Class{4D36E965-E325-11CE-BFC1-08002BE10318}

3. Right clicked, then on right panel click new, then create two new key D-word.
Then rename it to Properties. In Properties create two new dwords

  • a. Name: DeviceType
    Type: reg_dword
    Hex Value: 00000002

  • b. Name: DeviceCharacteristics
    Type: reg_dword
    Hex Value: 00000100

4. Most important: Quickly uninstall the driver of cd/dvd from Device manager.

5. Restart. Scan for New Hardware.

6. Boom!! Problem Solved.

A general system error occurred: Unable to push CA certificates and CRLs to host or ESXi Host addition stuck at 80 % and failed

A general system error occurred: Unable to push CA certificates and CRLs to host <hostname/IP> 

The problem is mentioned in the release notes, “You might be unable to add a self-signed certificate to the ESXi trust store and fail to add an ESXi host to the vCenter Server system” , but this is not an good description.

There are 2 solutions, one thats in the release notes and another is the workaround I have already published.

NOTE: This is fixed in later versions, so if you see the problem, please try to check NTP or time on the ESXi host certificate is not issued in the future.

This is a workaround: you can change an advanced setting on the vCenter; vCenter -> Configure -> Settings -> Advanced Settings:

 vpxd.certmgmt.mode = thumbprint 

This may also affect other operation on the ESXi hosts, I have not checked, but I think that it also means that you can not push new certifices to hosts, already added, and maybe also other things.

Note: This solution can create a new problem later see the blog.

The solution: in the VMware release notes is to change an advanced setting: “The fix adds the advanced option Config.HostAgent.ssl.keyStore.allowSelfSigned. If you already face the issue, set this option to TRUE to add a self-signed server certificate to the ESXi trust store”. They do forget to mention that you need to restart the management agents “services.sh restart” true the server console og SSH, or reboot the hosts.

To do this a little easier, i have made a script to do this, from PowerCLI, and also using plink.exe. This script is just a sample, that you can modify, for your use case.

$cmd = “services.sh restart”

$hostname = “esx01.domain.local”

$esx_Password = read-host “Input ESXi root password: “

$vmhost = connect-viserver -server $hostname -user root -password $esx_password

set-VMHostAdvancedConfiguration -Name “Config.HostAgent.ssl.keyStore.allowSelfSigned” -value true

$sshService = Get-VmHostService | Where { $_.Key -eq “TSM-SSH”}

Start-VMHostService -HostService $sshService -Confirm:$false

cmd /c “echo y | C:\temp\Plink -ssh -pw $($esx_Password) root@$hostname $($cmd)”

disconnect-viserver $vmhost -Confirm:$false

$vmhost = connect-viserver -server $hostname -user root -password $esx_password

$sshService = Get-VmHostService | Where { $_.Key -eq “TSM-SSH”}

Stop-VMHostService -HostService $sshService -Confirm:$false

disconnect-viserver $vmhost -Confirm:$false

Hope this will help you.

The best solution would be, not to use self issued certificates.

Note: Check if time is correct on the ESXi hosts, this could give similar problems.

Extending an EagerZeroedThick Disk

Source VMKB:2054563

~ # vmkfstools -X 6G -d eagerzeroedthick /vmfs/volumes/cs-ee-symmlun-001A/cormac.vmdk
Grow: 100% done.
All data on /vmfs/volumes/cs-ee-symmlun-001A/cormac.vmdk will be overwritten with zeros from sector <8388608> onwards.
Zeroing: 100% done.

If you extend the disk by using UI, you have no control over all the options to extend the disk. As a result, the EagerZeroedThick VMDK automatically becomes LazyZeroedThick.

Get ESXi IPS and Version from simple powershell command

Step 1 :

Connect-VIServer ‘vcenter’

Step 2 :

Get-VMHost | Select Name,@{n=”ManagementIP”; e={Get-VMHostNetworkAdapter -VMHost $_ -VMKernel | ?{$_.ManagementTrafficEnabled} | %{$_.Ip}}}, PowerState, Manufacturer, Model, @{Label = “ESX Version”; Expression = {$_.version}}, @{Label = “ESX Build” ; Expression = {$_.build}} | Export-Csv -Path .\result.csv -NoTypeInformation -UseCulture

Step 3 : Done.

Reset ESXi trial license

Psot Source  Aaron from:

“This guide will give you the steps needed to reset the license file so that you can apply the evaluation license back to your ESXi host.

WARNING: This is for education/informational testing/development purposes only, and should not be used on a production server.

To reset your expired ESX 4.x, ESXi 4.x, ESXi 5.x or ESXi 6.x 60 day evaluation license:

  1. Login to the HOST via SSH or Shell
  2. Remove /etc/vmware/license.cfg
  3. Copy /etc/vmware/.#license.cfg to /etc/vmware/license.cfg
  4. Restart the vpxa service

Or simply copy the code below and paste it into your SSH session.

rm -r /etc/vmware/license.cfg 
cp /etc/vmware/.#license.cfg /etc/vmware/license.cfg 
/etc/init.d/vpxa restart

Then open the “Licensed Features” option in the configuration tab of the ESXi host through the vSphere Client.

Click on “Edit” in the top right of the “Licensed Features” page

Once the “Assign License” window opens you will see two options. There will be a category for “Evaluation Mode” and Assigned License. Click on the “(No License Key)” option and then click “OK”. This will set the host back to “evaluation” mode and will give you access to all features for 60-days!”

*Update* This works if the current trial licensed hasn’t expired yet. If it has already expired, ether it be existing trial or an alternative license type, the above trick doesn’t seem to work. When navigating to the license area of the host afterwards it expects you to enter a key. (I didn’t test actually putting in all 0’s which might just be the field text indicator and not actually filled). but it wouldn’t let me proceed. In this case a host reboot might be required by following these commands instead:

rm /etc/vmware/vmware.lic
rm /etc/vmware/license.cfg
reboot

This worked and I was able to spin up my VMs on the host again.